Auto body repair shops deal with physical damage to cars and trucks, often caused by collisions. They perform repairs to restore vehicles to their pre-accident condition, including painting and refinishing.
After visual inspection, they may tear down parts to inspect further damage to Juanito’s from the surface. Skilled technicians use a fine balance of precision and diligence to prep surfaces, applying just the right amount of body filler. Contact Juanito’s Auto Body now!

A layer of paint that’s applied to a vehicle to add shine and protect the colored basecoat. It also helps curb corrosion on metal surfaces by preventing water and oxygen from reaching the metal’s surface. There are several different kinds of auto body paint, including urethane, acrylic and water-based. Each type has its own advantages and disadvantages, but a high-quality job requires a durable coating that can hold up to the elements.
A spray pavehithat’s usually polyurethane and comes in either a clear or tinted formula. It’s designed to help the primer and basecoat adhere to a vehicle’s surface, and it can be used in an air compressor spray gun. It must be used outdoors or in a well-ventilated area since it can release toxic fumes when it dries.
During the prep process, a technician may use a power sander to remove any damaged surfaces from the vehicle, as well as a grinder or body filler to create a smooth surface. This process can take hours, but it’s vital to achieving a quality finish.
Color matching is an essential skill for a skilled auto body technician, as it’s how they hide any gaps and imperfections in the new paint job. An experienced painter knows how to create a seamless blend and can even match the paint color of a vehicle’s original factory paint code using specialized tools.
When a customer wants to purchase parts from an auto body shop, they can choose to pay cash or set up a payment plan. Some shops partner with specific lending agencies to offer special financing for customers. Other establishments offer a range of payment options, from credit cards to personal loans.
Frame
A car’s frame is the load-bearing structure that gives a vehicle its rigidity and allows it to transfer the forces of driving. It’s also responsible for the vehicle’s structural integrity, meaning that a damaged frame will weaken certain areas of the car or truck. An experienced auto body repair shop will use an electronic measuring system to make sure that your vehicle’s frame is straight and fits factory standards.
The frame used on modern cars and trucks may be made of steel, aluminum, or a combination of these metals. They’re usually covered by a protective pcar’sc coating that reduces the risk of corrosion and rust. Some frames have crumple zones, which absorb the impact of a collision by “crushing” in order to protect passengers. These zones are a great safety feature, but they can partially compromise the frame’s structural integrity after a collision.
An auto body repair shop’s frame machine is designed to restore a damaged frame to its original shape and position in the vehicle. The damaged vehicle is driven up onto the machine, which holds it firmly in place with rigid clamps. Then, the machine’s chains are hooked to specific points on the frame based on diagnostics. The hydraulic equipment slowly increases the tension of the chains to pull that area of the frame back into shape. The machine’s electronic measurement system ensures that the adjustments are correct so that your car drives and handles as it should.
There are different kinds of frame machines, including electronic, universal fixtures, and dedicated fixtures. Dedicated fixtures allow a body shop to measure and locate key body points without having to rent or buy a new fixture for each new model of car. Electronic and universal systems, however, require an extensive database of the proper specifications for each vehicle in order to work correctly.
Body Filler
Body filler is used to smooth and repair dents, dings and other imperfections in the vehicle’s metal surface. It can be sanded and painted over to create a seamless, uniform surface.
Different types of body filler are available, depending on the scope of the repair. Standard body filler is ideal for small rust spots or minimal damage, while premium body filler is appropriate for larger areas of rust or actual tears in the vehicle’s metal sheeting. Regardless of which type of body filler you choose, it is essential to properly prepare the surface before applying it. This can include cleaning the area and roughing up with coarse sandpaper to ensure that the body filler adheres to the metal.
Most body filler is a two-part material, consisting of a resin-based filler and a cream hardener. When the product is mixed, it combines chemically and forms a solid. It is important to follow the manufacturer’s instructions when mixing and using body filler to avoid issues such as excessive shrinkage, improper curing and other problems.
Some body fillers are made with unique characteristics to offer advantages such as flexibility, increased strength or faster cure times. Examples of specialty body fillers include flexible polyester body filler for plastics, carbon fiber-reinforced body filler for SMC and fiberglass, and 1K spot putty to quickly fill pinholes before refinishing.
For a reliable and quality body filler, shop at your local AutoZone. We carry a wide variety of trusted products from top brands like Bondo and Evercoat to help you Do the Job Right.
Windshield
A windshield may seem like a minor component of your vehicle, but it serves an important function. It keeps wind, water and debris from penetrating your car interior during a collision and it supports the vehicle roof in case of a rollover. It also helps to prevent injury or death by reducing the force of airbag deployment in front passengers. For these reasons, it’s crucial that you keep your windshield in good condition.
When a windshield gets chipped, it’s essential to repair it as soon as possible. Delaying the repair can lead to cracks that obscure your vision. A reputable auto body shop can fix small chips, but larger ones may require glass replacement.
Many auto body shops have their own windshield repair technicians on staff or they have strong relationships with local companies they can refer customers to. These services typically cost between $60 and $100 for a single windshield chip repair.
The process used by these professionals involves filling the affected area with resin. They then cure the resin using UV light. Once the chip is fully repaired, it will be virtually unnoticeable.
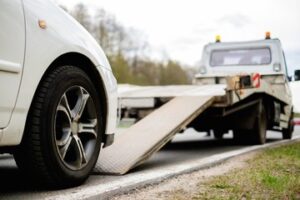
Auto body shops can also provide a couple of additional benefits that specialized glass repair businesses cannot. First, they can arrange a rental car service for customers while their vehicle is being repaired. This can be incredibly helpful for those who have multiple repairs requiring extensive time and labor.
Another service that auto body shops offer is collision alignment. This includes checking rear camber, toe, front caster and camber. It’s a good idea to have this done after a collision, as it ensures that your vehicle’s frame, suspension and tires are aligned with one another properly. This helps to reduce your chances of future collisions and improve your vehicle’s performance on the road.
Window Replacement
The windows in your vehicle are pivotal in protecting you from the elements, accidents, and potential theft. They must remain in pristine condition to preserve their integrity and ensure your safety and visibility while driving. This is why auto body shops are invaluable in preserving your car’s window glass.
When it comes to repairing or replacing the window, the best option is to contact a shop that specializes in automotive glass, as they have specialized tools and equipment for working with it. Often, your insurance company will also have preferred auto glass companies that you can use as well.
Repairing cracks in window glass is a relatively quick and simple process. The technicians simply inject a clear resin into the crack, which dramatically reduces its appearance and enhances the integrity of the window. If the crack is too large, the technician may recommend a full replacement instead.
If you’re not ready to pay for professional repairs, many stores offer DIY kits that can address minor damage. However, keep in mind that DIY kits can’t produce the same level of precision needed to blend the repaired area with the rest of the window. This can leave noticeable imperfections that can compromise the overall aesthetics of your vehicle.
If you do choose to go with a DIY kit, make sure to clean the area and cover it with plastic that doesn’t obstruct your field of vision while you drive. This will protect the interior of your vehicle and keep out rain, dirt, and other debris until you can get the window replaced. Wear gloves when removing the old window to avoid scratching the frame or interior components.