The job of a quality excavation contractor stretches far beyond digging into the soil. They provide a host of services that make construction projects progress smoothly from start to finish.
They know what equipment to use for different types of vegetation and terrain. They also follow strict safety standards. Keep reading the article below to learn more about Excavating Company.
They know which permits are required for land clearing and how to obtain them quickly
Excavation sites present many dangers. The biggest risk is a cave-in or collapse that can cause severe injuries to workers and even mass deaths. This is why strict safety measures must be followed. Civil engineers who specialize in this type of work can help ensure that these measures are taken. They can also provide advice on other issues that may arise during construction, such as how to handle soil that is prone to subsidence.
The first step to take before starting excavation is to call 811. This number will connect you with a utility locator who will identify the locations of all underground gas, electric, water, sewer, and communication lines in the area. This will allow the excavating company to avoid accidentally digging into these lines, which can be extremely dangerous.
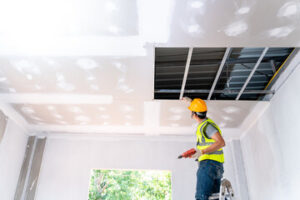
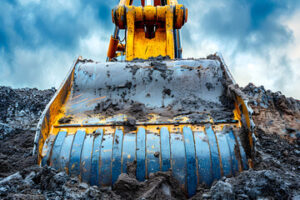
Another important thing that an excavating company must do is clear the site before beginning construction. This is often done by using heavy machinery, such as bulldozers, backhoes, and trenchers. These machines are essential for completing the job, but must be operated with caution and proper knowledge of their capabilities.
In addition to clearing the land, excavating companies can also install critical infrastructure, such as water and electrical systems. They can also set up erosion control systems to minimize environmental damage. They can also perform a geotechnical analysis of the soil to determine its composition and reactionary characteristics. This will help them plan for the appropriate equipment and machinery required to complete the job.
Hiring commercial land clearing services can save time and money in the long run. These professionals understand local laws and regulations regarding land clearing, so they can help you obtain the necessary permits quickly. They can also conduct regular inspections to make sure that all safety protocols are being followed.
Another benefit of using a professional commercial land clearing service is that they can save you money by avoiding fines and penalties. They are familiar with the various environmental and safety regulations that must be followed when working on a construction site, and they can provide you with detailed reports of any violations.
Saves Time
Excavation contractors lay the groundwork for construction projects, and it’s crucial that they do their work correctly. Otherwise, delays in construction can add up, resulting in increased costs and frustrated stakeholders. That’s why it’s best to entrust excavation tasks to experienced professionals.
Nothing derails a construction timeline like unexpected problems during excavation. A well-prepared contractor will have a plan in place for how to handle these challenges, saving valuable time and keeping the project on schedule.
Before any digging begins, a professional excavation contractor will conduct a thorough site evaluation to assess the terrain and soil conditions. This will help them determine the type of machinery and tools needed for the job, as well as any potential obstacles that may hinder progress. Additionally, a professional excavation company will know the ins and outs of local zoning laws and safety regulations. This ensures that all permits are obtained in a timely manner and that all work is completed safely and to code.
Excavation can be dangerous, especially when working near underground utilities, and even a minor mistake can cause expensive damage and delays. Professional excavation companies are trained to follow strict safety protocols, minimizing the risk of injury or property damage. They also have access to specialized equipment that’s well-maintained and operated by skilled technicians. This can reduce machine downtime and increase operational efficiency.
Whether it’s clearing sites of native vegetation, removing old structures, or digging trenches for utility lines, excavation sitework contractors are truly the unsung heroes of construction. They’re responsible for preparing the site not only for immediate construction needs, but also considering the long-term ecological impact. In order to minimize disruption, they take measures such as relocating wildlife, creating barriers, and scheduling work around breeding seasons. They’re also tasked with ensuring that construction materials are sourced responsibly and complying with environmental laws.
Saves Money
When working with an excavation contractor, it is important to be clear on what you want them to do and how much you’re willing to spend. This will help them provide you with a more accurate estimate of how long the project will take and the cost. It’s also a good idea to have a detailed plan for the project. This will make it easier for the excavating company to prepare for the job and save time.
In addition to digging, excavating contractors also offer many other valuable services that can help a construction project go smoothly. For example, they can trench for utility systems. This is a crucial service that ensures safety and prevents the risk of damaging underground utility lines. They can also perform soil testing to determine the consistency, density, and moisture levels of the ground. These tests are essential for ensuring that the ground is safe and suitable for construction activities.
Another invaluable service that excavating contractors provide is locating and marking utility lines on site. This is an essential step in any excavation project because it prevents workers from accidentally hitting a power line or gas line. Lastly, they can also do land development work, such as leveling hills or filling valleys. This can improve the overall look of a construction site and increase its functionality.
One of the most important things to remember about excavating is that it is a complex process that requires expert knowledge and skill. A quality excavation contractor will not only save you money by completing the job quickly and efficiently, but they will also provide you with a high-quality finished product.
Jeff and his team at YEC have worked hard to build a reputable business. Their steadfast commitment to excellence and customer satisfaction has made them one of the leading excavating companies in York. Their goal is to make each client’s construction experience as easy and pleasant as possible, allowing them to focus on what really matters: building their dreams. Learn more about how YEC can save you money by calling today.
Experience
Excavating contractors perform a wide variety of tasks that are crucial to construction projects. From laying the foundation to managing underground utilities, skilled excavation contractors help ensure that projects are completed efficiently and on budget. Choosing a contractor with extensive experience in their field ensures that all aspects of a project are properly handled to reduce future problems and delays.
When selecting an excavation company, be sure to ask about their specific areas of expertise. You can also request references and reviews from previous clients to get a sense of the contractor’s quality of work, customer service, and professionalism.
A top-tier excavation contractor has a specialized understanding of soil conditions, utilizing heavy machinery to prep construction sites for building and landscaping projects. Their skills are crucial in preparing a site for a concrete foundation, trenching for utilities, and removing debris safely. Their specialized knowledge and sophisticated equipment are essential for the successful completion of construction projects.
An experienced excavation company is also capable of identifying and managing contaminated soil on a construction site. This can be an issue in urban and industrial areas where past activities may have left harmful substances in the ground. In these cases, excavation companies must utilize specialized remediation techniques to protect nearby residents from environmental harm and health risks.
Many excavation projects require permits. It is important to find a contractor that is upfront about which permits are needed for a particular job and can assist with organizing both the permit and inspection process. It’s a good idea to discuss these requirements with a potential contractor before beginning the job, so there is no confusion about which permits are required for the excavation process.
Choosing the right excavating company can save you time, money, and hassle by providing professional services that are both efficient and effective. They can handle all aspects of a construction project from initial planning to the final stages of construction, ensuring that all elements are in place to build a sturdy and durable structure.